
If anybody who shatters his or her Samsung Galaxy Note 4 LCD screen, no worry. There are a few options you can consider. Either you can turn to a Samsung Warranty or you can replace a new screen. We suggested not to repair the Samsung Galaxy Note 4 yourself unless you are indeed an experienced phone repair techs. If you insisted you are a DIY handy person, this guide is for you.
Step One
Power off the device
Pull out the S Pen Stylus
Pull the battery door out

Step Two
Remove the Samsung Galaxy Note 4 battery from the body

Step Three
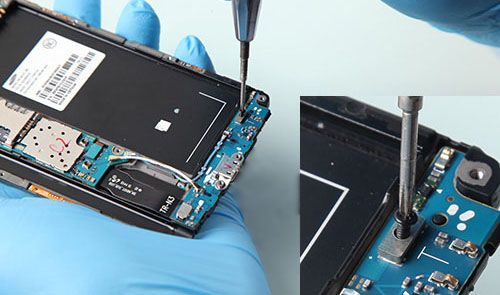
Remove the 16 screws in the rear housing
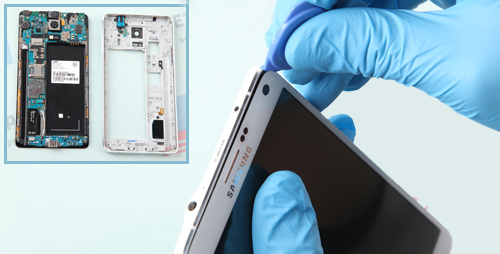
Widen the gap between the housing and body and remove the rear housing by case opening tool

Step Four
Pry up the 4 connectors
Remove the Screw
Remove the upper portion of logic board and pry up the flex connector with extreme care


Step Five
Remove the vibrating motor with power button flex cable
Remove the ear speaker with flex cable

Step Six
Pry up the 2 connectors
Remove the screw
Pry up the charging port assembly and then pry up the 2 connectors


Step Seven
Heat up the Samsung Galaxy Note 4 LCD Screen Replacement Assembly for 2-3 minutes in order to soften the adhesive in between and remove the middle plate by case opening tool

Step Eight
Adhere Samsung Galaxy Note 4 front housing adhesive to the middle plate and then connect the LCD screen flex cable and digitiser flex cable to the logic board

Step Nine
Put the vibrating motor with power button flex cable in the slot

Step Ten
Put the ear speaker with flex cable into the slot

Step Eleven
Put the logic board in the slot and connect the Galaxy Note 4 Charging Port Assembly to the board

Step Twelve
Connect the ear speaker with flex cable to the logic board

Step Thirteen
Connect the home button flex ribbon to the logic board

Step Fourteen
Connect 2 antennas to the mother boards


Step Fifteen
Fasten 1 screw in the charging port assembly
Step Sixteen
Fasten 1 screw in the mother board.

Step Seventeen
Cover the rear housing and fasten the original 16 screws you took off previously in the rear housing
Step Eighteen
Put the battery in and insert the stylus pen to the rear housing


Step Nineteen
Cover the battery cover and then you are done.
No comments:
Post a Comment